Orkin “Points of Service”

+

Studio: Transistor Studios

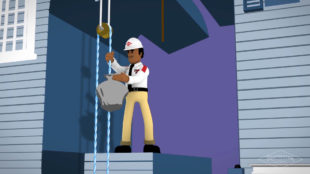
This was a fun project to be a part of with an incredible team. I worked on about half the shots and my duties included texturing, shading, lighting and rendering as well as compositing and creating some of the 2D transitions between shots and delivering the final render.

JetSmarter

+

Studio: Vayner Media

Using Maya and Arnold, I was responsible for lighting on this spot. My shots included the following:

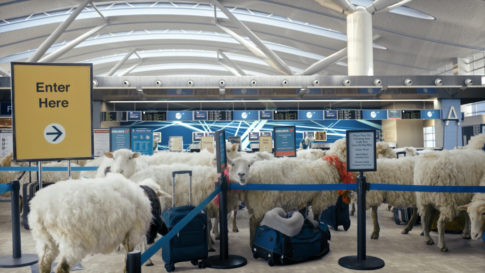
Airport line (00:14) – I cleaned up the airport model, scene setup, modelling, texturing, shading, lighting and rendering of the CG background.

Security Line (00:20) – For this shot I was responsible for lighting, some modelling, shading, some texturing and rendering. I also worked with the compositor to render additional passes he needed.

Last shot (00:17) – Lighting and rendering of the CG baggage cart

In addition, I created the shaders for the CG luggage that were used in all shots.

Snapple

+

Studio: Transistor Studios

We had a lot of great and talented artists for this spot, working with the great John Payne who was the lead and TD director, I was on the animation team as well as helped with technical issues when John was busy. Although challenging, we had a lot of fun on this one.

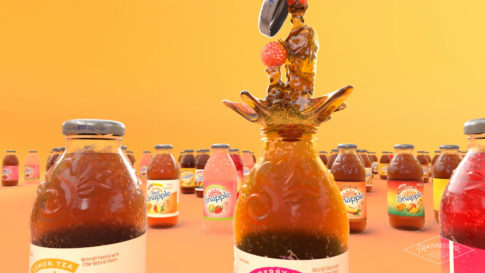
Using MASH in Maya, I painted in the condensation on the bottles and the labels.
Jumping from shot to shot, my duties included technical support, animation, pre-viz animation, some modeling and more.

Shot 01 – Scene setup, animation of the fruit and cap going off
Shot 05 (00:05) – Scene setup and animated the fruits crossing path, also exported alembics so the Houdini artist could do the simulations
Shot 06 (00:06) – Scene setup including fruit animation, some rigging, animated the camera and the cap going off
Shot 07 (00:07 – overhead shot) – Rig and scene setup, animated the camera going up and the fruits
Shot 09 (00:10 – overhead shot) – Scene setup, camera and cap animation, I also added the alembics from other shots for the water and fruits animations
Shot 10 (00:12) – Scene setup and camera animation

I also exported geometry and alembics for the Houdini artists among other miscellaneous things.

Snapple “Apple Social”

+

Studio: Transistor Studios

This is the other short social animation I worked on, for this one I worked on scene setup, animated the apple coming off from the label and animated the apple getting sliced in pieces, I then created an alembic which I handed off to the Houdini artist who simulated the apple falling and the pieces spreading on the floor. I also used MASH to paint in the water drops on the bottle with Maya.

Snapple “Mango Social”

+

Studio: Transistor Studios

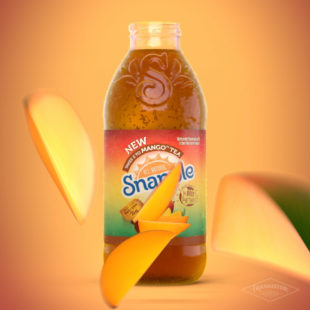
This is one of the short animations we created for social media. For this one I worked on scene setup and animated the pieces of mangos coming off from the label, animated the cap going off and added the water drops on the bottle using MASH in Maya to paint them in.

Hasbro “Monopoly Gamer MarioKart”

+

Studio: Transistor Studios

Working on this project was cool, I spent many hours playing the Super Mario games as a child.

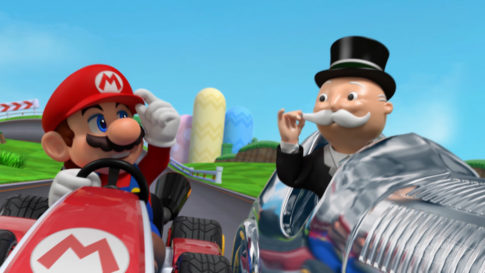
For this spot I was in charge of all the CG shots, this included cleaning up scenes and updating them with new animated models, shading and applying textures provided by Nintendo to all the characters, karts and all the environments. As the only lighter on this project, I worked on every CG shot from shading to rendering the final images which I handed off to the compositor.

Victoria’s Secret “Fashion Show – In Show Bombshell Nights”

+

Studio: Moondog

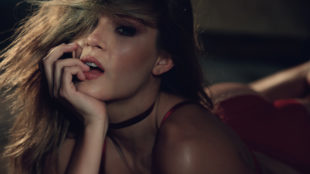
Using Maya and MASH, I painted in the gold flakes on the bottom of the bottle, I modeled the flakes to have a hexagon shape to match the real bottle. Then, I created the lighting and shaders for the bottle, I animated the camera before rendering the scene.

CNN “The 2000s”

+

Studio: Loyal Kaspar

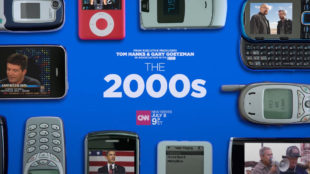
Using Maya and Redshift, I worked on scene setup, shading, texturing, lighting, animation and rendering on some of the props. These included:

-Black iPod on 00:10, lighting, shading and rendering.
-V600 Flip Phone on 00:16 – animating, shading, texturing, lighting and rendering
-Droid Phone on 00:17 – Some re-modeling, shading and lighting
-Projection TV on 00:18 – Using old diagrams and photos, I modeled, textured, shaded and lit the scene before rendering it.
-Macbook Pro on 00:22 – Shading, lighting, animation and rendering of it.

Planet Fitness “Disco Ball”

+

Studio: Gentleman Scholar

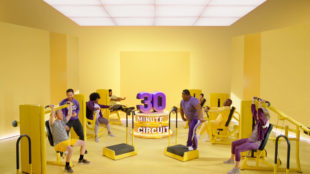
This was a fun project to be a part of, I was brought in to do some lighting, shading and rendering among other things.

-Shot 05 (00:13) – I worked on the shading of the “30 minute circuit” model, lighting on the whole scene which included the back wall and ceiling lights, along with incorporating the model in the scene by rendering ground reflections, matching the scene’s lighting and more. Also, modeled, shaded and light the ceiling lights and using camera projection got reflections of the scene on to the 3d model.
-Shot 03 (00:06) – Ceiling light rendering and lighting and other miscellaneous fixes on other shots like logo re-rendering and addressing client’s comments.

CapitalOne “Right Now”

+

Studio: EightVFX

Another spot of the CapitalOne series, in this project I was responsible for
Shot-03, in which I animated the FX buildup and created all the render passes for them.

CapitalOne “Reset Boston”

+

Studio: EightVFX

This is 1 of 4 CapitalOne projects I worked on while at EightVFX. For this spot my responsibilities included:
-Creating the deconstruction effect in MASH from scratch and I was in charge of teaching the other artists how to use the MASH network in their scenes
-sh010 animated the deconstruction effect of the old bank in MASH, I then created a destruction cache file which was used by another artist for Shot-02
-Rendered all passes
-In Shot-04 when the actor is entering the cafe, I animated the flip effect on the walls and sign, also on the alternate version, I placed the cg table, chairs and umbrella and rendered them and the flip. In addition, I animated the sign geo to match the plate.
-Layout of the geo and other miscellaneous work

CapitalOne “Refreshing Isn’t It Boston”

+

Studio: EightVFX

My responsibilities for this spot included the following:
-Rendering of the FX particles for Shot30, Shot40 and Shot50
-Created the original MASH network used to break up the geo, then helped other artists with questions on how to apply it to this scene.
-Started the layout scene of the interior bank at the beginning of the project
-Modeling simple props and camera setup for the initial layout
-Matched transformations of some geo with new updated geo
-Re-meshed some of the letters so they could be used with the MASH network
-Other miscellaneous work

CapitalOne “Push Around Boston”

+

Studio: EightVFX

Another cool spot and great team. For this project my duties included:
-The reversed engineering of a MASH setup that was provided and creating my own setup for the build up effect, and I was in charge of helping other team members with questions of the MASH network
-Shot 05 – Created and rendered the background layers, including a caustics pass. Additionally, rendered the old bank and the beauty of the new bank
-Shot 06 – I created and animated the FX buildup and animation of the walls and props, including chairs, tables and floor. Each FX Flip reveal has two layers. I did not work on the animated lines, that’s another layer created by another artist. I also rendered and re-meshed the cafe walls and interior props geo so that they could be used with the MASH setup
-Shot 08 – Rendering of the props, re-meshed the old bank for the MASH network
-I also created all the render layers for my shots(05, 06, 08) and worked with the compositor by providing additional renders needed. Additionally, created animation caches for the chairs, tables and umbrella, which other artists used in other scenes.

AT&T “Security”

+

Studio: Transistor Studios

This was a challenging but fun project, everyone at Transistors was great, really cool team we had on this one. Can’t see it from this low res version, but the canion shot(city mid level or shot 3), it was my shot and I had to populate it with office furniture and a lot of other stuff for the x-ray to work, scenes were a couple of gigs in size. We ended up splitting them into Arnold ASS files to be able to manage and render them.

My main other shot was the x-ray overhead shot of the city(shot 6), starting from a shader that was provided to me, I developed the x-ray look according to the directors comments.

I also helped with other miscellaneous modeling and shader setup and helping some of the team members setup their lighting and shaders so they all look the same.

Cinnamon Toast Crunch “Coffee Shop”

+

Studio: Chrlx

This project was a lot of fun to be a part of. I was brought in near the end of the project to work on setting up render passes, also I worked with the compositor and created any extra passes he needed.

Jamieson “Spotlight”

+

Studio: Studio Pascal Blais

For this project I modeled the base model the leaf character in a T pose.

Jamieson “Treadmill”

+

Studio: Studio Pascal Blais

For this project I modeled the base model of the leaf character in a T pose.

Child Hunger Ends Here “Feed One More”

+

Studio: Passion Pictures NY

In this project which was directed by Saschka Unseld, the Pixar director of “The Blue Umbrella”, I was responsible for lighting, texturing, shading and rendering a number of shots using Maya and Arnold.

My shots: (in order of appearance)
07 – Box Pick up: Using a provided texture for the box, I shaded, created the lighting and rendered this shot.
08 – Twins pop-up: Created the lighting for the whole shot, including background and characters.
12 – Kitchen Scene: Using a gray kitchen model, I created all the textures, UV’s and shaders for the kitchen, in addition to the lighting for both the environment and characters.

In addition, I also created some precomps in Nuke for quick previews and worked with the compositors in creating additional passes they needed.

Goody’s “ReliefShot” & “Powder”

+

Studio: Passion Pictures NY

Using Maya and Arnold and as the only lighter in this project, my responsibilities were the following:

-Created the textures/shaders and lighting for the entire commercial, except for the powder/liquid in the car interior shot.
-Shading and lighting of the CG car including the water in the exterior shot.
-Shading and lighting of the neurons.
-Worked with the compositors for any extra passes they needed.

PediaSure “Sponge Boy – Day With Mom”

+

Studio: Passion Pictures NY

The second spot of the sponge series. Working with the same awesome team as the first one, we were able to complete this spot right after the other. As with the other spot my responsibilities included look development (Look Dev) and lighting in Maya, Arnold Renderer and Nuke, also setting render layers (passes) and finishing the shot by working with the compositors. Using background plates with grey and chrome balls, plus other reference objects, I match the lighting to these in Maya using Arnold and by editing the provided HDR images.

My shots included:
05-Bottle Pick Up (lighting, texturing CG bottle, rendering, etc)
06-Drinking Pediasure (lighting, texturing CG bottle, rendering, etc)
07-Height Measurement
08-Playground swings (just Look Dev for this one, render layers and rendering setup by another artist)
09-Running To Bus (lighting, CG Props, rendering, etc)
10-Backpack Pick Up

It was a blast working on these.

PediaSure “Sponge Girl – Soak It Up!”

+

Studio: Passion Pictures NY

This was a great project to work on, we had a great team. My responsibilities included look development (Look Dev) and lighting in Maya, Arnold Renderer and Nuke, also setting render layers (passes) and finishing the shot by working with the compositors. Using background plates with grey and chrome balls, plus other reference objects, I match the lighting to these in Maya using Arnold and by editing the provided HDR images.

My shots included:
07-Backyard butterfly catch (lighting, texturing the nets, rendering, etc)
09-Drinking Pediasure (lighting, CG bottle, rendering, etc)
10-Vallerina Running
11-Vallerinas leaning on mirror (just Look Dev for this one, render layers and rendering setup by another artist)
12-Car looking out – Look Dev by another artist, and I setup the render layers and rendered it.

Thanks for watching!

Hyundai “Globus – PlanetV”

+

Studio: SuperFad

This was a video playing on the streets of Time Square in New York City, it was one of two huge TV screens where this video was playing in one of the screens, that’s why there is no sound. Working as part of a small team, I worked mainly in the Korea scene, where I created the transition animation into the Korea scene. I modeled, textured and animated the buildings, street and part of the sidewalks. Also, I textured and animated the trees and many of the props. I created the lighting and render passes for the Korea scene except for the physical sun pass. I also worked on modeling, texturing and layout for other scenes as well.

American Express “BGR”

+

Studio: Logan NY

As part of a small team, I worked on modeling and cleaning up the buildings, airplane, trees and sidewalks. Also, I worked on scene layout and the ICE simulations on the airplane. The ICE simulation creating the building was done by another artist. I helped in applying the same effect to other objects and scenes. Setting passes and rendering as well.

Galaxy Chocolate

+

Studio: Passion Pictures NY

I helped with simulating a cloth material on top of a temp 3D couch, so that we could use the cloth to attach the particles on. Using an ICE compound created by another artist, I helped in attaching the cloud point to the cloth and modifying it when necessary, also shading the ICE particles, lighting and rendering them. As well as the 3D cloth passes used to blend it with the real one. In addition, I created the initial setup for the cloth simulation where the actor touches the cloth and interacts with it. Modeled, textured, created the lighting and rendered passes for the box with the logo and the cloth it stands on in the final shot.

White Castle “Brand” Get Them When You Crave Them

+

Studio: SuperFad

In this spot and the other, I textured and animated the logo in the beginning and the logo doors falling down. I created the layout and rotation setup of the scenes. Modeled, textured and animated most of the props like: owl, chicken, moon, fence, clock and burger cards. I also modified the logo animation at the end to fit the new timing. The props falling on the strings animation and “Rule” text exploding were done by another artist. Setup and rendered passes for the spot, created, textured and animated the clock and the text “Get Them When You Crave Them”, among other things.

White Castle “Retail” We Are Making The Bacon

+

Studio: SuperFad

As in the other White Castle spot, I modeled, textured and animated most of the props and text, including: owl, chicken, clock and text “We Are Making The Bacon”, etc. Except for the falling props on strings animation and the text “Rule” exploding in the beginning. I also modified the logo animation at the end to fit the new timing. Setup render passes among other things.

Clearasil “Seal To Clear Adapt With Apple Tag 30”

+

Studio: The Mill

As in the other Clearasil spot, I contributed by creating some shaders, tracked some shots and animated some of the shots with ICE. Also, setup the lighting and render passes for the molecules. We worked on both spots at the same time.

Lenovo “For Those Who Do”

+

Studio: Brand New School

Modeled and animated the ribbons going around the buildings in the cityscape shot , lighting them and rendering the passes, also started the pre-comp in After Effects. In addition, modeled, shaded, animated and rendered the 3D portion of the text “Future”.

Clearasil “Jay Z Face Wash|Mask”

+

Studio: The Mill

For this version I contributed by creating some shaders, tracked some shots and animated some of the shots with ICE. Also, setup the lighting and render passes for the molecules.

Verizon Droid “Snow Bot”

+

Studio: The Mill

For this spot, I was responsible for the phones. I created the textures in Photoshop, the shaders, lighting and rendering the passes for the compositors, except for the last phone that floats at the end. Also, modeled the robot head that’s under the snow.

Verizon Droid 2 “Digits”

+

Studio: The Mill

My contributions for this spot included creating textures in Photoshop, texturing, lighting and rendering the passes of the CG Phone.

Verizon Droid X “Hotspot”

+

Studio: The Mill

My contributions for this spot included: the 3D tracking of the woman when she’s opening the laptop and modeling where she’s sitting, 3D tracking the laptop and PSP. Modeling and tracking the staircase where the kid is playing with the PSP and optimizing the laptop model.

Verizon Droid X “Eagle Eye”

+

Studio: The Mill

For this Droid X Spot, I was responsible for importing the robot arms and head model in the 3D scene and tracking it to match the back plate for some of the shots. Also, setting up renders for the lights.

Folgers “Special Roast”

+

Studio: Ladies & Gentlemen

My responsibilities in this spot included: scene layout, animating the camera, lighting the scene and modeling of the mountains and logo. Also, texturing the two big mountains with a matte painting created by another artist. Created the render passes for the mountains except the beauty which another artist used Arnold to render it, also some of the passes for the text. Lastly started the ICE tree which used weight maps for replicating the trees.

Dusk ID 7 & ID 1

+

Studio: Imaginary Forces -NY

ID 7

This ID shows the full animation of the crow scene, in which I was responsible for texturing, rendering and animating the crows flying around. I also use ICE to animate the flower petals and dusts floating around them.

ID 1

I modeled, textured and animated the lighting going across her face. Also, created the final composite in After Effects.

Dusk

+

Studio: Imaginary Forces -NY

For this spot, I was responsible for texturing, rendering and animating the crows flying around. I also use ICE to animate the flower petals and dusts floating around them.

Trowe Price “Rice”

+

Studio: Psyop

My responsibilities included animating the growing trees with ICE in XSI(Now AutoDesk Softimage). Some modeling, texturing and setting up passes for the compositors.

Dusk “Teaser”

+

Studio: Imaginary Forces -NY

In this teaser, I created the moon, textured it and animated the lighting of it. Also, animated the butterflies in some of the shots, in addition to creating the pre-comp of the butterflies that flame used as reference for the final comp. Lastly, I added volumic lights coming from the windows in the room scene where the butterflies are flying.

O2 “DSL”

+

Studio: Psyop

Modeled and animated the phone cord, the 3D text, the 3 main hero 3D lines and animated the camera. And setting up passes for the lines and text.

O2 “Kundenmonitor”

+

Studio: Psyop

Animated the camera, the 2D cards for the people and the 3 main 3D lines, as well as setting up passes.

Milk “Medusa”

+

Studio: Psyop

I was brought in near the end of the project to work on the first shot court yard in the background. Using the Styleframe photoshop file, I separated the various elements for which I then builded simple geometry to camera project them on.

Milk “Sad Princess”

+

Studio: Psyop

I modeled and textured the flowers the soldier is holding just before the ship sinks, also modeled and textured the piece of the ship the hero is riding the waves with.

Nat Geo Family

+

Studio: LoyalKaspar

This is a 15 second commercial for the National Geographic Channel, in which I modeled, texture, light and rigged the 3D treasure chest at the end of the spot.

Infiniti “Bridge”

+

Studio: Mass Market

For the first 2 shots, I was incharge of lighting, texturing, rendering and of doing pre-comps in After FX before it went into Flame. Created the shaders for the ribbons and setting up a general lighting rig for all the other shots. Also, created the shaders for the cloth and most of the shaders for the cars.

Infiniti “Tunnel”

+

Studio: Mass Market

For the first 2 shots, I was incharge of lighting, texturing, rendering and of doing pre-comps in After FX before it went into Flame. Created the shaders for the ribbons and setting up a general lighting rig for all the other shots. Also, created the shaders for the cloth and most of the shaders for the cars.

Adidas “CVA” Beijin Olympics 2008

+

Studio: Psyop

Modeled and texture the 3D tennis net, setting up volume lights, textured some of the 3D eyes, and animated, textured and lit the shot of the 3D ball bouncing off the ground. Textured, lit and animated the ball in other shots as well. Also, lighting for the 3D characters in some shots and some cloud animation.

Adidas “Together” Beijin Olympics 2008

+

Studio: Psyop

I modeled, textured and light the volley ball net and the ball. And near the end, I created a volumetric lights pass for when the diver is first coming out of the water.

Fernet Branca

+

Studio: Psyop

Using ICE in XSI, I animated the big foreground tree as well as the background ones. Animated the opening flower with shape animation, animated the wash that goes over the white part of the Ying & Yang sign. Also, used the Pwrapper script to convert the particles to geo so they can be shaded.

Century21 “Internet Listing Guru”

+

Studio: Psyop

I modeled the hills, layout the trees throughout the scene, animated the houses and the clouds, and setup the render passes.

Century21 “Open House April”

+

Studio: Psyop

For this spot I animated the April text, layout the trees throughout the scene, modeled the hills, animated the clouds, textured and did additional modeling on the sign at the end. Also, setting up the render passes for the compositors.

Century21 “PathHome”

+

Studio: Psyop

On the last shot of the spot I modeled the hills, the path to the house which I also animated, layout the trees throughout the scene, animated the clouds and setup the render passes for the compositors to use.

Adobe “Anthem”

+

Studio: LoyalKaspar

In this 38 seconds spot for Adobe Acrobat 8 Professional, my duties included the texturing, lighting and some animation of many of the scenes, also many other tasks like After FX and Photoshop work.

ESPNU “Advance”

+

Studio: LoyalKaspar

As with the other spots, I worked on the texturing and passes setup of the map as part of a team.

ESPNU “Rivers”

+

Studio: LoyalKaspar

I modeled the river’s path by modifying the original map mesh. Then, as part of a team, I helped with the texturing and passes setup for the map.

ESPNU “Bleed”

+

Studio: LoyalKaspar

These spots were full 1080p resolution, so working with 7k animated textures was a bit of a challenge. After receiving the ink animation from the After FX team, as part of a 2 man 3D team, we textured and setup render passes.

ESPNU “Roads”

+

Studio: LoyalKaspar

I modeled, textured and lit the roads, then worked on the texture of the map and setup render passes as part of a team.

SyFy “Castle”

+

Studio: Blind

I created the volumic lights in the light posts and the truck. Also, setup the render passes.

SyFy “Windmill”

+

Studio: Blind

For this spot, I textured and animated the windmills, the ground breaking, and the cable that connects to the house. Also, setup the render passes.

Oil Of Olay “Ribbons”

+

Studio: HeadLight

I was in charge of modeling, texturing and animating the ribbons so they look like they were underwater.

Twenty120 “Wolfie”

+

Studio: HeadLight

As the lighting TD for this short, my responsibilities included texturing and lighting the Russian dolls and setting up the render passes for all the shots. I also animated about half the shots, including the one where they go into each other, and all of the facial expressions.

NASCAR “Championship”

+

Studio: UVPH

On the first scene I modeled and textured the fences and the broken down bridge, and textured the signs on the road. Also, exported nulls for the compositors to place the 2d cards.